How to Create Indoor Navigation Maps
Learn how to create indoor navigation maps with these seven simple steps to improve visitor experience and streamline your venue's operations.
TECH
4/18/202513 min read
Make Indoor Navigation Maps in 7 Easy Steps
Indoor navigation is a system that helps people find their way inside large buildings like airports, malls, hospitals, resorts, and offices. It works by showing users where they are and guiding them step by step to where they want to go.
These systems are designed so people don’t have to keep stopping to ask for directions, guess their way around, or feel lost in unfamiliar spaces. Indoor navigation also helps building operators make spaces easier to use for everyone, from first-time visitors to staff who work there every day.
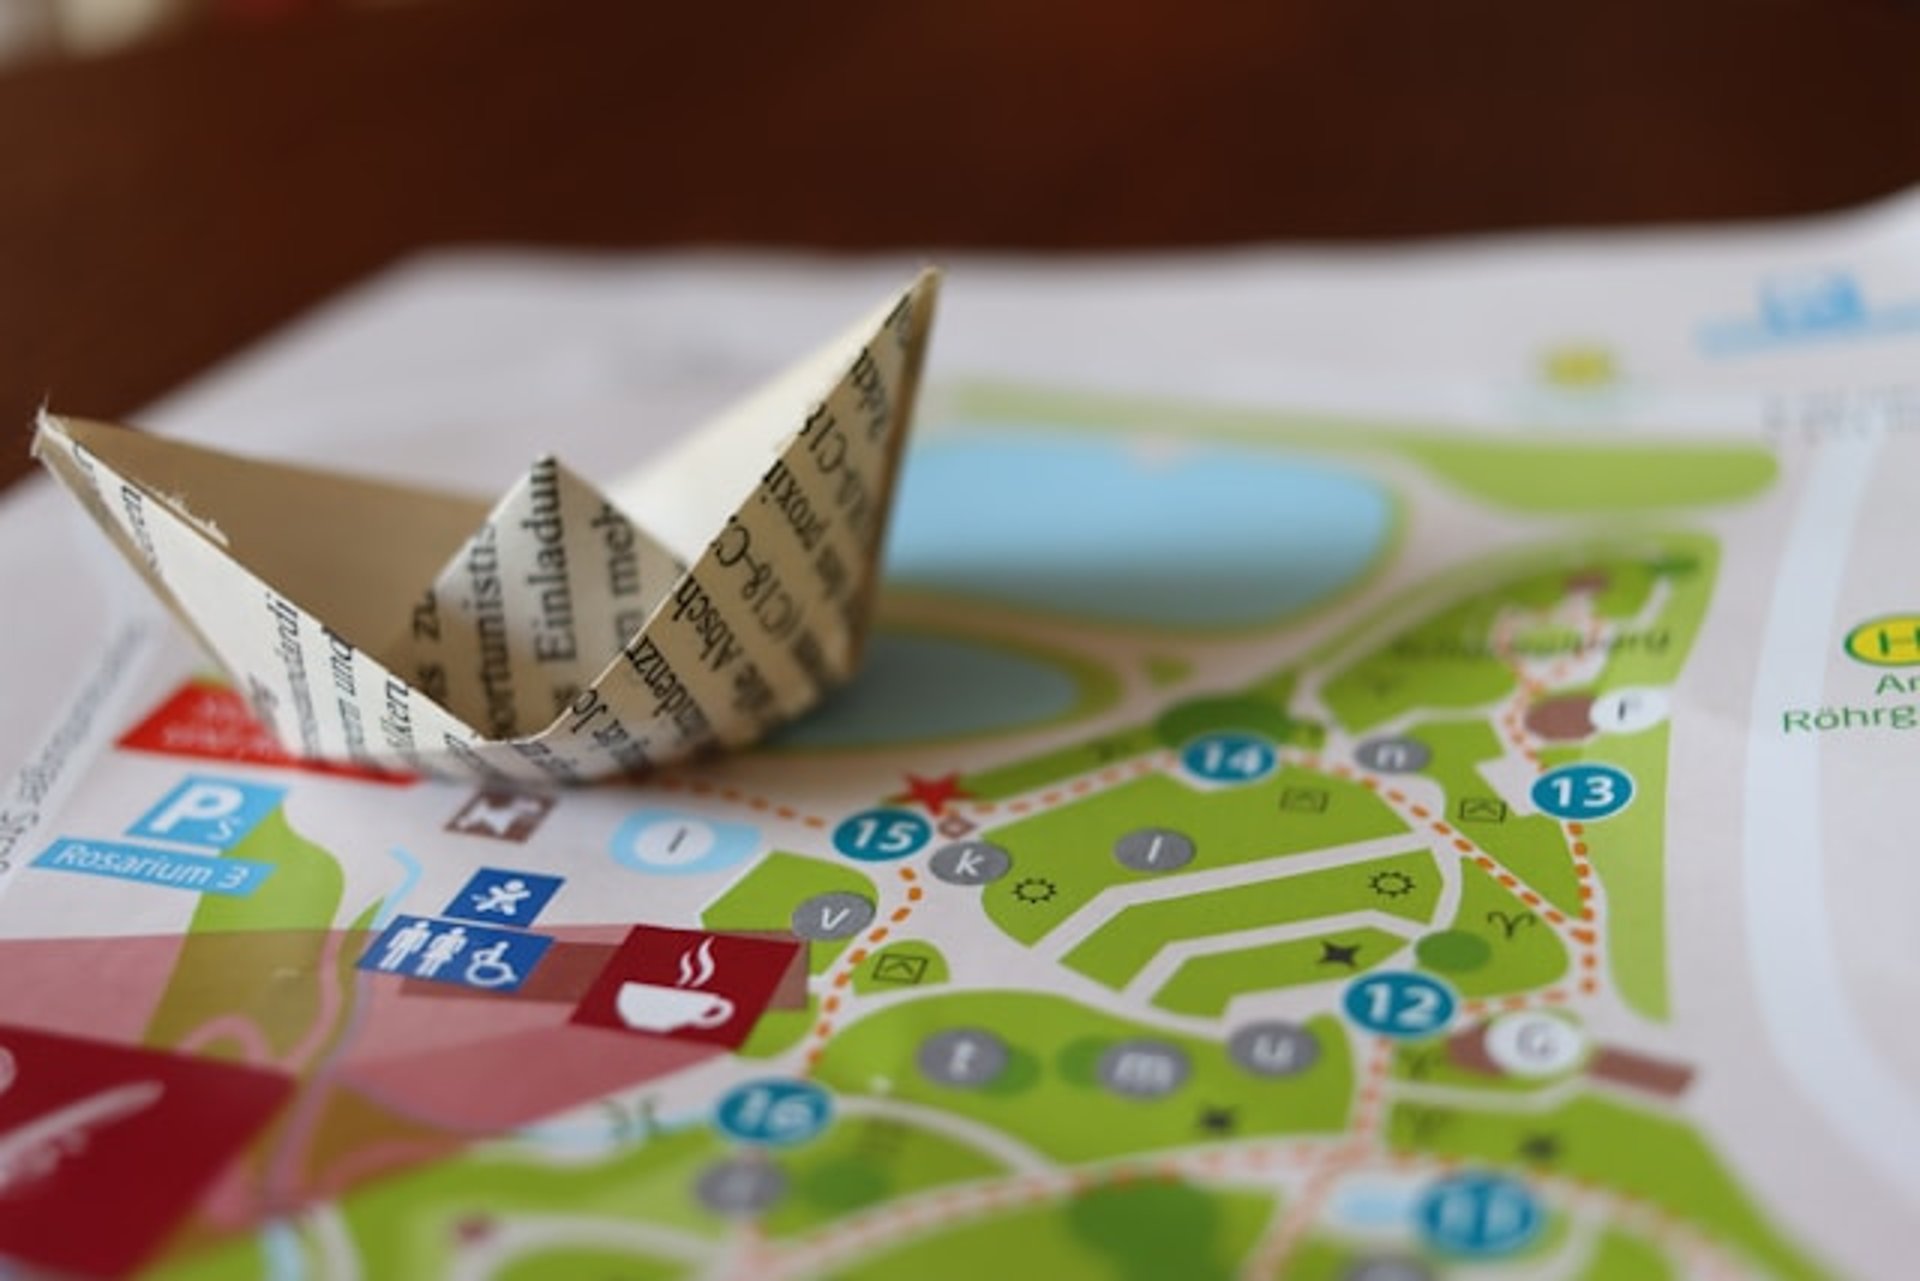
What Goes in an Indoor Navigation Map?
A complete indoor navigation setup includes four main elements: a digital map, the user’s live position, a way to calculate distance and routes, and clear guidance to follow along the way.
Let’s discuss each of them one by one.
Indoor Mapping
Every indoor navigation system starts with a map of the space. And don't be mistaken: this isn’t a simple sketch. It’s a detailed digital layout of each floor, hallway, shop, room, and access point. The map shows where people can walk, where they cannot, and what kind of places they’ll find around them, like bathrooms, elevators, or coffee shops. Users can explore it by zooming in or clicking on specific areas to get more details.
The map is usually part of a mobile app or a website and often comes with a side panel that gives helpful information such as opening hours, photos, and contact numbers for each location.
Before the map can guide anyone, a network of walkable paths has to be drawn on it. This includes stairs, elevators, ramps, and restricted areas. It also accounts for different kinds of users. For example, someone using a wheelchair might need a different path than someone who doesn’t.
If you miss this step, everything else can fall apart. The accuracy of the map and network affects how well the rest of the system performs.
Real-Time User Positioning
The second part of indoor navigation is showing the user’s live location, often represented by a small blue dot on the screen. This dot helps people know exactly where they are when they open the app. It updates in real time as they move.
This feature works using signals from technologies like WiFi, Bluetooth beacons, or Indoor Positioning Systems. Some systems try to use GPS, but GPS doesn’t work well inside buildings. The more precise the positioning, the better the experience.
People need to feel grounded before they can move forward. Guesswork here only leads to frustration.
Distance and Route Calculation
Once a person’s location is clear, the system can figure out how far they are from where they want to go. It does this by measuring the distance through the available paths on the map. It then draws a line showing the route and gives a time estimate for how long the walk might take.
This step helps people plan their movement through the building. They know what to expect, how far they’ll need to go, and what path to follow.
It’s a lot like using your phone’s GPS for driving, except indoors. The logic is similar, even though the environment is different.
Step-by-Step Guidance
After the path is drawn, the navigation begins. The system gives live instructions to help the person reach their destination. These can be simple directions like “Go straight” or “Turn left,” or more specific ones based on nearby landmarks like “Turn right at the bookstore.”
Better systems allow users to switch between full-route view and navigation mode easily. This lets people check the entire path and then return to step-by-step mode without confusion.
Context-based directions feel more natural and easier to follow. They match how people normally talk about places and movements in everyday life.
Indoor navigation gives people confidence when they’re inside a place they don’t know. It reduces the need to ask for help, saves time, and makes it easier to move through large or complex buildings. When all four elements work well together, people can move through indoor spaces just as smoothly as they do on the road.
7 Steps to Creating Indoor Navigation Maps
Follow the seven steps below to create an indoor navigation map that works smoothly and reflects your space accurately.
1. Define your indoor map goals.
Sometimes you need to step back to move forward. Space that seems fine on paper may not work in practice until people start using it.
Indoor navigation maps don't just tell people where to go — they solve real problems inside complex spaces.
So, before you build an indoor navigation map, take a step back and ask: Why do we need this? Every organization has different needs. An office might want to make it easier for employees to find meeting rooms. A shopping mall might want to help customers locate stores that move or change over time. A train station might simply want people to reach their platforms on time without asking for help.
List down your reasons clearly. When you know exactly what you want the map to do, the design becomes much easier to manage and maintain. Some companies want smoother movement in buildings. Others want to collect better data. In either case, indoor maps must serve a purpose beyond just showing locations.
Indoor maps can connect with sensors in the building that detect where people go and how they move. This information helps you spot patterns. For example, if too many people crowd a certain hallway or exit, you can adjust furniture or signage to improve flow. If a specific meeting room is always empty, maybe it's in the wrong location or not well-marked.
When you see how people really move through your building, you can make smarter choices about how to use the space. This kind of insight helps you make smarter choices: change how space is used, adjust staff placement, or highlight underused areas that could have a better function.
An indoor navigation map also helps manage how your building uses energy. By knowing when and where people are active, the system can help control lighting, heating, and air conditioning in real time. When rooms stay empty, energy usage can drop automatically. The same map can also help the maintenance team. When systems malfunction, workers can find the faulty equipment quickly, report issues on the spot, and fix problems before they grow. Regular system checkups can be scheduled based on real-time data instead of waiting for something to go wrong.
During emergencies, communication can make the difference between chaos and calm. Navigation apps linked to emergency protocols can push alerts directly to people inside the building. Users can see exit routes on their phones, receive updates as the situation changes, and locate fire extinguishers or first aid kits without asking for help. After the event, the system collects useful data, such as which exits were used most or where bottlenecks occurred. This helps in preparing smarter evacuation plans for the future.
User experience also improves remarkably with a well-designed indoor map. People visiting a large building or venue often feel disoriented. A navigation app that shows their live position and the path to their destination helps them feel in control. They can explore, switch between destinations, or make informed choices without needing directions from staff. Real-time positioning helps people navigate indoor spaces just like they do on outdoor GPS apps.
2. Decide on the best indoor mapping solution.
At this point, you’ve already figured out your goals and understood what kind of experience you want to offer inside your building.
Now, the focus shifts toward finding a partner who can help you materialize the plan, ideally someone with the tools, track record, and adaptability to match your vision.
Start by looking into their experience. Not just the number of years on their website, but how they’ve spent that time. A provider with real-world knowledge across industries usually brings tested solutions to the table. That means fewer surprises during implementation and smarter ways to solve problems as they come up.
Next, check how many clients they’ve supported. A long list of case studies can give you more insight than a flashy portfolio. Pay attention to the types of buildings they’ve mapped; are any of them similar to yours? A provider who has worked across train stations, airports, office buildings, or museums probably understands the unique needs of complex indoor spaces. Ask them how many square feet they’ve mapped in total. It’s a simple question that often reveals the depth of their hands-on experience.
On top of that, look at how well their solution plays with others. If you already use digital tools inside your space, make sure the mapping solution can integrate with them. You might have a building management system, a visitor app, or a website that shows floor layouts. Your chosen provider should offer tools that slot in without too much friction. You may also want the option to plug in future features, such as booking capabilities, analytics dashboards, or location-aware alerts. These types of add-ons can turn a basic map into a powerful business tool.
Then, consider how the provider handles support. From time to time, systems break down. Bugs show up. Data goes out of sync. During those moments, a good support team makes all the difference. Ask about their response time, support channels, and issue tracking. In spaces with high foot traffic, such as malls or hospitals, even a short disruption can cause a ripple effect. A reliable partner helps you stay on top of problems before they impact your users.
In short, don’t just choose based on features. Think about who you’ll be working with, how much they understand your space, and how responsive they’ll be when it matters. The best indoor mapping solution doesn't necessarily have to be the most popular option in town; it should fit your space, your systems, and your people.
3. Get your 2D floor plan.
A 2D floor plan acts as the structural base for everything that follows. Whether you use a scanned blueprint, a PDF layout, or a CAD drawing, your floor plan should reflect the actual space — room sizes, wall placements, entry points, and shared areas — as they exist today.
Locate the most recent version of your floor plan. In many organizations, the facilities or admin teams keep a copy of these documents. If not, check with the building owner, architect, or property manager. Make sure the file includes accurate dimensions and shows any recent modifications to the structure. Formats like DWG or DXF are often preferred by mapping platforms, though high-resolution PDFs can work in some cases.
Most providers use vector data to mark spaces and draw paths. This method makes your layout more adaptable and allows the map to scale correctly on mobile apps, kiosks, and web platforms. The floor plan must align with real-world coordinates, so the navigation paths match the actual distance and flow inside the building.
You can also define meeting rooms, hallways, stairwells, restrooms, retail sections, or any other point of interest. Each zone can include names, categories, and visual markers. When you've added all your branding elements (color schemes, logos, and custom icons), the map fits within the look and feel of your existing platforms.
In case your space changes, for example, if a room is repurposed or a new section opens up, updating the map becomes much easier with the 2D plan in hand. Henceforth, the digital mapping process moves ahead with fewer issues and fewer delays. Some providers offer visual editing tools with which you can mark changes directly onto the map interface. This setup can save you time during routine adjustments or seasonal updates.
4. Mark the important spots inside your building.
After setting up your floor plan, locate the points inside your space that people need to find. These are your Points of Interest, often called POIs. When you've identified them, your indoor map becomes a useful guide instead of a flat diagram and people move from one place to another without confusion, delays, or frustration.
The best way to go about it is you walk through the building — either physically or virtually. Take note of places that visitors ask about often. These could include restrooms, elevators, staircases, or entryways. In public buildings or offices, you might also mark help desks, security stations, or accessible routes like ramps and wide corridors. These spaces serve practical purposes and affect how people move around during the day.
In other cases, amenities help round out the visitor experience. Mark vending machines, payphones, water fountains, or ATM machines. If your space includes shared meeting areas, add rooms, stages, projectors, or speaker systems to the map. These types of POIs help staff and guests move with purpose: they know where they need to go, and they can get there without asking someone for help.
Safety-related POIs need careful placement. Identify spots where people can find first-aid kits, fire extinguishers, or emergency exits. In case of an emergency, people must know exactly where to turn, even without instructions. You can support this effort by placing symbols or icons on the digital map and including those same signs throughout your physical space.
A good navigation app matches real-world behavior. It allows users to search for POIs, tap a location, and follow a clear path from their current spot. To make this work, your POIs must sit in the right location on the map and include accurate labels. That’s where consistency helps. Use naming conventions, standard symbols, and clear categories to group your POIs, so the map looks clean and works as expected.
There are several indoor mapping tools that you can use to create a legend for all your POIs. This single-source-of-truth of sorts is usually placed in a corner of the screen and helps new users understand the meaning behind each icon or color. More importantly, it gives them a context of the location at a glance.
5. Map out every detail inside your space.
To create a strong indoor navigation map, you must collect and categorize all the location-specific information about your space. Floor layouts and walkways provide a structure, but the finer details bring the map to life. These details direct people clearly from one point to another and help them make sense of your space without confusion.
Gather information about every area that people might need to visit. In a shopping mall, for example, this includes every store, restaurant, kiosk, and service point. Place each tenant into a category based on what they offer: clothing, electronics, beauty, or dining. Note which type of audience they serve. A comprehensive set of details allows customers to search and move through your mall with confidence.
If the indoor navigation app is for an office building, collect details about rooms that serve specific purposes. Meeting rooms, departments, executive offices, reception desks, storage areas, and lounges all are instrumental in defining how the space functions as a whole. Label them clearly and note their exact locations within the building. This helps both visitors and employees move through the building efficiently.
Use a list, table, or spreadsheet to sort this information. This format helps your indoor mapping provider upload it into the platform without confusion. Beyond the primary benefit of consistent formatting, a clean layout with full names, unit numbers, and descriptive tags is easier to use down the line. When visitors search by room name, shop type, or location category, the system matches their query with the information you've provided. They won’t waste time wandering or asking for directions at every turn.
This documentation also makes updates more manageable. When a room changes function or a new business sets up shop in your venue, you won’t need to redo your map. Just update the list and pass on the new details to your provider. This saves time and keeps your digital maps accurate without much effort.
6. Align your indoor map to real-world coordinates.
The next step is to build an indoor map that works well for navigation.
And for that, you need to match every digital element with the physical layout of your space.
Geo-referencing makes that possible. By connecting digital maps to actual coordinates, you can create a layout that reflects real measurements and physical dimensions. Each feature, be it walls, doors, hallways, or open areas, must fall into the right place to guide people accurately through a building.
Geo-referenced maps also provide uniformity between the virtual and the real. When someone moves through your space, their position on the map should reflect their real location. Visitors navigating a hospital, retail center, or university campus expect accuracy. A well-referenced map removes confusion, shows realistic movement paths, and supports decision-making in the moment.
Luckily, there are several digital mapping tools which use coordinates that correspond to actual points inside your venue. You can update your layout by stretching wall segments, adjusting room dimensions, shifting entrances, or redefining passageways. Each change carries over to the digital version without affecting the overall scale or orientation.
Real-world measurements also improve the user experience. When a person follows directions from one point to another, the timing and distance feel right. Routes make sense. Landmarks appear exactly where they’re expected. In busy places like shopping malls or transport terminals, this level of alignment creates a smoother flow of movement and reduces uncertainty.
Geo-referencing lays the foundation for advanced map features as well. Location-aware services such as indoor positioning, wayfinding, and real-time tracking depend on accurate spatial data. If your map doesn’t line up with the building, those services can mislead or confuse users. That’s why mapping vendors must work with data that reflects the physical environment closely.
Choose a vendor who understands how to match maps to real spaces. Ask how they measure, what tools they use, and how often they update their data. In large venues or multi-floor buildings, even small inaccuracies can throw off the entire navigation experience. A vendor who prioritizes spatial accuracy will save you time and annoyance in the long run.
7. Bring your brand identity into the indoor map.
An indoor navigation map shouldn't feel separate from the rest of your digital experience. It should reflect your brand’s style, tone, and values just as clearly as your website or signage. When visitors use your map, they should immediately recognize where they are and who they’re engaging with.
Place your logo in a visible yet unobtrusive spot. The presence of your logo anchors the design and signals ownership. From there, apply your brand’s color scheme throughout the map. Whether your palette includes vibrant hues or subtle neutrals, these colors shape the way people perceive the interface.
Typography works the same way. Select fonts that already appear across your digital and physical materials. A familiar typeface makes the map feel like a natural extension of your brand, not a borrowed platform. If your company uses a style guide, send it to your mapping vendor upfront. That way, you avoid visual mismatches down the line.
Design elements like icon shapes, layout spacing, and interactive buttons also deserve consideration. These small touches often carry your personality. Rounded edges, minimalist icons, or bold labels can support the way you present yourself to customers or employees. These cues shape the user’s experience as they navigate your space.
Clear labels and direction markers help visitors move through the map with ease. When those labels use the same voice as your brand’s other touchpoints, the experience becomes smoother and more engaging. For instance, a hospitality venue might use casual, welcoming terms for rest areas or information desks. A corporate office could use a more structured naming style for meeting rooms or departments.
Interactive features can support your branding goals too. Transitions, motion effects, or the arrangement of elements on the screen can mirror your company’s design preferences. Some businesses prefer streamlined layouts that focus on speed, while others lean toward expressive visual storytelling. Either approach can work; what matters is alignment with your identity.
Choose a mapping platform that lets you make updates easily. As departments shift, tenants change, or event areas expand, the map should adapt without disrupting its design. A flexible system ensures that your visual identity stays in place as your physical space evolves.
Final Thoughts
A strong indoor map supports daily operations, reflects your physical space accurately, and gives your visitors the confidence to move through it without confusion. Each step listed above, when done with care, will help you create a map that stays current, feels intuitive, aligns with your goals, and delivers a uniform experience across all touchpoints.
Explore
Welcome to Stay Curious, your home for free online calculators and blogs that make you stop and think. Here, questions never get old and answers are always a little unexpected.
We dig into the weird and wonderful, challenge the obvious, and cover topics that make you think, "Why didn't I know this sooner?" From quirky facts to deep dives into everyday mysteries, we are all about satisfying that itch for knowledge you didn't know you had.
So go ahead, stay curious. We promise it'll be worth your while. Or, you know, not. ;)
Contribute
Learn
ask.staycurious@gmail.com
© 2025. All rights reserved.
We welcome guest posts on business, tech, travel, finance, lifestyle, career, relocation, and home improvement. Submissions must be original, unpublished (online), at least 800 words, and written in English.
Ready to contribute? Contact us with your ideas!