
15+ Food Business Ideas for Students (Most Under $300)
This guide on food business ideas for students lists more than 15 small business options, setup tips, budget advice, and strategies to reach fellow classmates.
BUSINESS
Ronan Avery
8/19/202535 min read
Food Business Ideas for College Students: 17 Low-Cost Options to Start From Your Dorm or Home
Last updated: October 2026
TL;DR
Start with no-oven, shelf-stable products. Dry-mix cookie jars ($57), spice blends ($82), popcorn ($83), granola and trail mix ($94) and snack boxes ($106) cost the least and cause the fewest headaches in a dorm.
Budget $57 to $300 for most ideas. Equipment is a one-time purchase, so your second batch will out-earn your first. Salad jars, granola bars and the food cart run higher, with the cart landing between $1,330 and $3,700.
Baked goods, drinks and meals pay better per sale, but they demand more. Expect to pocket roughly $2 to $6.50 per sale before counting your time, along with tighter schedules and stricter rules for perishable or hot food.
Pick the model that suits your life. The guide pits baked goods against meal prep, snack boxes against single treats, delivery against campus markets, online sales against local ones, and home kitchens against commercial ones.
Price with a formula, not a hunch. Add supplies and labor per unit, then multiply by 1.3 to 1.5.
Stay safe and stay local. Take a food handler course, label allergens, hold cold food at or below 41°F (5°C) and hot food at or above 135°F (57°C), and hand orders off in public spots.
Launch within 30 days. Choose one product, make a small batch and sell to ten classmates through group chats and pre-orders.
Read this first: This post assumes you already have prior permission to run a food business where you live, and that you’ve arranged any permits, licenses or food safety requirements that apply to what you sell. In a residence hall, that means written approval from your housing office or resident life team. In a rental, it means a green light from your landlord. Housing contracts and campus policies often restrict both commercial activity and cooking appliances, and every school sets its own rules. Nothing here counts as legal advice, so confirm the details with your housing office and your local food authority before you sell anything.
College costs a lot these days, and plenty of families feel the squeeze. A Trellis Strategies survey, as reported by Inside Higher Ed, found that 68% of students had run out of money at least once since the start of the year. Meanwhile, Ellucian’s 2024 survey of 1,500 US college students found that 59% had considered dropping out because of financial stress. With numbers like those floating around, it’s no surprise that so many students go looking for side income that won’t eat their whole schedule.
Food makes a natural starting point. Everybody eats, most people on campus are short on time, and your customers live a few doors down the hall. Word travels fast in a residence hall, too, so one happy buyer can easily lead to several more. Beyond the cash, you’ll pick up skills that no lecture teaches: costing out a recipe, handling a last-minute rush, talking a hesitant customer into giving your product a try. Those skills will still look good on a resume long after graduation.
This guide walks through 17 food business ideas that suit college students. Each one comes with an itemized startup budget, the cost of making a single unit, a realistic selling price and a rough sense of what you’ll pocket. After you’ve picked a favorite, the later sections cover the pieces that make or break a student food business: food safety, equipment, packaging, pricing, suppliers, selling and safe delivery.
A quick word about the numbers: Every dollar figure below is an estimate in US dollars, based on typical retail prices. Costs shift by city, store and season, so treat the figures as a planning tool and double-check them before you buy anything. When you see “net”, it means what’s left after you’ve earned back your full startup outlay. That figure leaves out your time, along with any card or platform fees.
How to Pick a Food Side Hustle as a College Student
The best idea isn’t the trendiest one. It’s the one that fits your wallet, your kitchen and your calendar all at once. Work through these three questions before you spend a dollar, and you’ll dodge the most common false starts.
What's my budget?
Before anything else, decide how much money you could lose without losing sleep. That sounds gloomy, but it’s the most useful number you’ll set. A first batch almost never turns a profit on its own, because your earliest sales have to pay back every piece of equipment you bought. Start with $60 to $110, and a sluggish first week stings a little. Start with $300, and the same sluggish week can feel like a real setback. Treat the money as an experiment: you’re testing whether classmates will pay for your product, and you’d rather find out cheaply.
Do I have access to a functional kitchen?
Your menu will be limited to what you have available in your kitchen. If you have a small fridge and microwave you can still cook from your box of snacks, jars and dried mixes. However, if you have access to a communal kitchen you may have more options, although you will have to keep it quiet between late at night and early morning. Some buildings will shut the kitchen or limit what you can cook during this time, so keep that in mind as well. Be sure to inquire if there is a working oven and hob, what times they are open and if you can store your ingredients.
If you move into an apartment off campus or your family home, you will have access to an oven, more working space and more space for larger meals. Whatever option you go for, ask your housing office beforehand to see what appliances you are allowed. Many residences do not allow hot plates or other open appliances so make sure you don’t buy one!
Does my class schedule give me any free blocks of time?
This is about what time of the day you will be working. Some items like granola or spice mixes are good to make in bulk and store. This means you can make a large batch on a slow Sunday and sell throughout the week. Whereas items such as salad jars or hot drinks have to be made every day and at precise times. Be honest with yourself, if your business requires two hours of your morning you will not get through a semester of 8am labs. Also plan around your busiest academic weeks. Midterms and finals will be the least energetic time for you but often the most demanding time for your customers.
6 Dorm-Friendly Food Business Ideas (No Oven Needed)
The six below all either involve using a small fridge, microwave, a small area of desk space, or no cooking at all. So naturally, they have the lowest set-up costs and cause the least appliance headaches. As ever, though, make sure to talk to your housing office first. There may be rules you weren’t expecting about storage, deliveries and selling within the building.
1. Homemade Snack Boxes
Picture a Tuesday night in the middle of midterm week. A friend down the hall has been living on stale vending-machine pretzels since noon, and a neat little box of trail mix, a couple of cookies and a chocolate bar would feel like a lifeline. That’s the whole appeal of a snack box. It bundles something sweet, something salty and something reasonably healthy into one grab-and-go package that suits study marathons, care packages and birthday surprises, and you can assemble it without switching on an oven.
Themes do much of the selling for you. Names like “study fuel,” “midnight munchies” and “healthy bites” tell a buyer what’s inside before they’ve read a single label. Begin with only three boxes (one healthy, one indulgent, one mixed) so choosing feels effortless and sourcing stays manageable. After you’ve built a base of regulars, a weekly subscription at a slight discount can turn one-off purchases into steady income.
Startup breakdown (about 20 boxes):
Bulk snacks: trail mix $18, dried fruit $12, cookies or biscuits $14, chocolate $12, pretzels or chips $9 = $65
Packaging: 20 kraft boxes $16, stickers or labels $8, tissue or filler paper $5 = $29
Two airtight storage bins: $12
Total outlay: $106 (add about $10 if you need a food handler course)
The math, in plain terms: Supplies run about $4.70 per box ($94 ÷ 20). At $8 to $10 a box, you’ll take home roughly $3.30 to $5.30 each. If all 20 sell at $8, you’ll collect $160, earn back the full $106 and finish $54 ahead.
One caution before you start packing: a mixed box can easily hide peanuts, tree nuts or wheat. Tuck a small ingredient card inside every lid so nobody has to guess.
2. Granola, Trail Mix and Energy Bites
Dry snack mixes follow a “make it once, sell it all week” rhythm. You can blend a big batch on a Sunday afternoon, bag it while a show plays in the background, and have inventory ready for days. Energy bites made from oats, nut butter and honey work the same way, and they don’t need an oven either, which makes the whole category a comfortable fit for a dorm.
Students tend to reach for snacks they can eat one-handed, so portion your bags for that: small, resealable and easy to toss into a backpack. Offer two or three flavors at first, then rotate in a seasonal one, such as pumpkin spice in the fall or tropical fruit once the weather warms up. Because nuts and seeds trigger allergies for plenty of people, write every ingredient on the label, and mention shared equipment if you handle peanuts anywhere in your space.
Startup breakdown (about 30 bags):
Ingredients: oats $10, nuts and seeds $18, dried fruit $10, honey and nut butter $12, chocolate chips $6 = $56
Packaging: 30 resealable pouches $12, labels $6 = $18
Tools: kitchen scale $10, mixing bowls and storage containers $10 = $20
Total outlay: $94
The math, in plain terms: supplies add up to $74, or about $2.47 per bag. Price each bag at $5 to $6 and you’ll keep $2.53 to $3.53 apiece. Thirty bags at $5 bring in $150 (net $56), and at $6 they bring in $180 (net $86).
3. Dessert Jars and Dry-Mix Cookie Jars
Have you ever been handed a jar of layered cookie mix as a gift? That’s the whole idea. You stack the flour, sugar, cocoa and chocolate chips for one recipe inside a glass jar, then attach a tag listing the wet ingredients the buyer will add later. Since everything inside is dry, the jar stays shelf-stable and needs no refrigeration, which sidesteps the biggest food-safety headaches. It also looks like a gift straight off a boutique shelf, so it sells well around birthdays, finals week and the holidays.
Presentation matters even more than the recipe here. A fabric topper, a twine bow and a handwritten baking tag can justify a price several dollars higher. Still, test your recipe at least twice before you sell it, so the cookies that come out of your buyers’ ovens taste the way you promised.
Startup breakdown (about 12 jars):
12 sixteen-ounce jars with lids: $18
Dry ingredients (flour, sugars, cocoa, chocolate chips, oats): $26
Ribbon, tags and labels: $9
Printed recipe cards: $4
Total outlay: $57
The math, in plain terms:: each jar costs about $4.75 ($57 ÷ 12). Priced at $12 to $15, a jar leaves you $7.25 to $10.25. Sell all 12 and you’ll bring in $144 to $180, which nets $87 to $123 once the $57 comes back to you.
A word of caution: refrigerated dessert jars, such as cheesecake or pudding cups, fall under much stricter food rules and need cold storage from start to finish. Dry-mix jars dodge both problems.
4. Refrigerated Jars: Overnight Oats, Parfaits and Salad Jars
Overnight oats and yogurt parfaits suit the student who rolls out of bed at 8:52 for a 9:00 lecture. They’re portable, they look great in a jar and they actually taste better after a night in the fridge. Salad jars cover the other side of the day, since gym-goers and health-minded buyers will happily pay for a fresh lunch they didn’t have to assemble. Both products photograph beautifully, which helps a lot when you’re advertising on social media.
The trade-off is that they contain dairy or fresh produce. They spoil faster than dry goods, they need cold storage all the way to the customer, and they often fall under stricter food rules. That’s why pre-orders matter so much. Set an order deadline, make exactly that many jars and hand them off within a day. You’ll cut waste, and you’ll cut risk too. Check the rules that apply to you before you buy a single jar.
Startup breakdown for overnight oats and parfaits (about 20 jars):
20 twelve-ounce jars with lids: $19
Ingredients: oats $6, yogurt and milk $9, chia seeds $5, honey $6, frozen fruit $10 = $36
Labels: $5
Insulated cooler bag $14 and ice packs $8 = $22
Total outlay: $82
The math, in plain terms:: jars, ingredients and labels cost $60, or $3.00 per jar. At $4.50 to $6, you’ll keep $1.50 to $3.00 per jar. Twenty jars bring in $90 to $120, so the first batch nets only $8 to $38. After that, the cooler bag and ice packs are paid for, and each batch costs about $60 while returning $90 to $120.
Startup breakdown for salad jars:
Glass or reusable jars: $50 to $100
Fresh vegetables, grains and proteins for the first stock: $100 to $150
Dressing bottles, small containers and utensils: $30 to $50
Labels or stickers: $20 to $40
Mini fridge or cooler: $100 to $200
Total outlay: $300 to $540 (or $200 to $340 if you already own a fridge)
The math, in plain terms:: at $4 to $7 per jar, your margin depends almost entirely on ingredient cost. Aim for ingredients that run about $2 to $3 per jar, and charge a small deposit on glass so jars come back for reuse. Since both products share the same jars, fridge and cooler bag, adding salad jars to an oats business costs far less than starting from scratch.
5. Popcorn and Flavored Snack Mixes
Popcorn is cheap to make and easy to dress up. Caramel sea salt, spicy cheese, cinnamon sugar and a chocolate drizzle can turn a pantry staple into something people will happily pay for. Better still, the smell of fresh popcorn drifting down a hallway does half your advertising. An air popper fits on a desk, so you won’t need a full-size popcorn machine to get going.
Pop in small batches, season while the kernels are still warm, and bag everything right away so it stays crisp. A rotating “flavor of the week” gives regulars a reason to check in again. Movie nights, game days and study-group sessions all make natural selling moments.
Startup breakdown (dorm version, about 40 bags):
Air popper: $25
Popcorn kernels (5 lb): $12
Oil, butter and seasonings (caramel, cheese, cinnamon sugar): $18
50 bags or cups with labels: $20
Small price sign: $8
Total outlay: $83
The math, in plain terms:: kernels, flavoring and packaging come to $50 for 40 bags, or about $1.25 per bag. At $3 a bag, you’ll keep $1.75 each. Forty bags bring in $120 and net $37 after the $83 outlay. Should you later graduate to a full popcorn machine for a campus stand, budget $100 to $200 for the machine alone.
6. Spice Blends and Instant-Noodle Upgrade Kits
Anyone who has cooked in a tiny kitchen knows how bland a plain bowl of rice or instant noodles can taste. A good spice blend fixes that in seconds. Blends weigh next to nothing, last for months and make easy gifts, which suits a dorm perfectly. Think taco seasoning, a garlicky stir-fry mix, a smoky popcorn topper or a chili-lime blend that goes on practically everything.
Startup breakdown (about 30 jars):
Kitchen scale: $10
30 two-ounce jars with lids: $24
Bulk spices for 30 jars: $34
Labels: $8
Funnel and measuring spoons: $6
Total outlay: $82
The math, in plain terms: each jar costs about $2.20 to make (jars $0.80, spices $1.13, labels $0.27). At $6 to $8, you’ll keep $3.80 to $5.80 per jar. Selling all 30 brings in $180 to $240, which nets $98 to $158.
Once you’ve bought the base spices, you can stretch them into a second product. An instant-noodle upgrade kit holds three small pouches: a seasoning mix, dried vegetables and a topping blend. A student can turn a fifty-cent packet of noodles into a proper dinner with it. Each kit costs about $2.00 to make ($1.40 in materials plus $0.60 for the pouch and label) and can sell for $4.50, which leaves $2.50.
Baked Goods and Treats From a Home or Off-Campus Kitchen
Although baking provides good margin and loyal customer base it does require the use of an oven and requires actual physical space on your counter top. So for most students this would mean baking from an apartment away from campus or a family kitchen. If this sounds like you then take a look at these four ideas.
7. Customized Cupcakes and Cookies
Not only do cupcakes with the initials of your friends piped onto them feel completely different to store bought muffins, students will actually pay a premium to get them. Orders can also come in quite a rush. Maybe your sports team orders three dozen cookies in their colours or one of your roommates orders six cupcakes for a surprise party.
While it’s actually not that expensive to bake from scratch, decorating can be very time consuming. Practice on your roommates before selling. Start off simple with chocolate, vanilla and red velvet. Once you’ve got past the piping with shaky hands syndrome, you can start getting creative with themed cupcakes. Target campus clubs, sports teams and cultural societies. Give them an introductory discount for buying in bulk as they tend to order more frequently.
Startup breakdown (about 48 pieces, sold as 8 boxes of six):
Equipment, if you buy it new: two 12-cup pans $24, cooling racks $12, bowls and spatulas $18, piping bags and tips $14, hand mixer $22 = $90
Ingredients: batter $26, frosting $10, decorations $10 = $46
Packaging: 8 six-count boxes $10, labels $4 = $14
Total outlay: $150 ($60 if you already own the equipment)
The math, in plain terms: supplies cost $60 for 8 boxes, or $7.50 per box. At $14 a box, you’ll keep $6.50. The first batch brings in $112, which leaves you $38 short of covering the equipment. The second batch nets another $52, so you’ll finish about $14 ahead.
8. Homemade Granola Bars
Granola bars hit the sweet spot between portable and filling, which explains how quickly they disappear from library tables and gym bags. The recipes forgive mistakes, too. Swap honey for maple syrup or almonds for sunflower seeds, and the bars still hold together. Because they last longer than fresh meals, you can bake one big batch and sell it over several days.
Wrap each bar individually and label every ingredient, since allergies worry a lot of buyers. Sell near busy spots such as gym exits and library entrances. Five- or ten-packs at a small discount also appeal to students who want to stock up for the week.
Startup breakdown (about 100 bars):
Oats, nuts, seeds, dried fruit, honey or nut butter: $50 to $100
Mixing bowls, baking trays and utensils: $50 to $100
Wrappers or eco-friendly packaging and printed labels: $40 to $60
Food permit or registration, if your campus or state requires one: $50 to $150
Total outlay: $190 to $410
The math, in plain terms: ingredients plus packaging come to $90 to $160 for 100 bars, so each bar costs $0.90 to $1.60. At a typical cost of $1.25 and a $2.00 price, you’ll pocket about $0.75 per bar. Watch your costs closely, because a $1.50 price leaves almost nothing once ingredients climb.
9. Bread and Sourdough
Fresh-baked bread stands out on a campus where most food arrives in plastic. Sourdough in particular attracts devoted fans, and a weekly pre-order system lets you bake to a known count. The schedule suits student life better than you might guess, because most of the work is hands-off. You can mix dough after class, let it ferment overnight and bake the next morning before your first lecture.
Expect a learning curve here though. Your first few loaves may turn out dense or flat, and that’s perfectly normal. Give yourself several practice bakes before you start charging, and recruit friends as taste testers.
Startup breakdown (about 20 loaves):
Equipment: Dutch oven $45, banneton basket $14, kitchen scale $12, bench scraper and scoring blade $10 = $81
Ingredients: flour (about 22 lb) $18, salt and yeast $2 = $20
Packaging: 20 bread bags $9, labels $5 = $14
A sourdough starter costs nothing if you grow your own.
Total outlay: $115
The math, in plain terms: supplies cost $34 for 20 loaves, or $1.70 per loaf. At $8 a loaf, you’ll keep $6.30. Twenty loaves bring in $160 and net $45 once the $115 is covered.
10. Gift Boxes for Birthdays and Exam Season
Some people shop for gifts at the last minute, and plenty of students live far from the people they care about. A gift box solves both problems. Bundle a couple of cookies, a tea sachet, a chocolate bar and a snack bag into one tidy package, and you’ve created something a student can send to a friend before finals or on a birthday without leaving their room. Demand tends to spike around birthdays, exam weeks and the holidays, so plan your inventory around the calendar.
A “send it to a friend” option adds real value: you deliver the box and tuck in the buyer’s note. Take pre-orders about a week before big dates, so you can shop and pack without the stress.
Startup breakdown (about 15 boxes):
Contents per box: two cookies $1.20, one tea sachet $0.50, one chocolate bar $1.00, one small snack bag $0.90 = $3.60, so $54 for 15
Packaging: 15 gift boxes $20, tissue and filler $6, ribbon and cards $8 = $34
Total outlay: $88
The math, in plain terms: each box costs about $5.87 ($88 ÷ 15). At $14 to $18, you’ll keep $8.13 to $12.13 per box. Fifteen boxes bring in $210 to $270 and net $122 to $182.
Drink Ideas for Students Who Run on Caffeine and Convenience
Drinks will always be a hot seller but hot and cold drinks are generally more heavily regulated by local laws than dry snacks, so you should know what applies to your situation before you invest in any equipment. Here are some popular options to consider.
11. Campus Coffee Delivery
Ask a roomful of students what keeps them going, and coffee will win by a landslide. A delivery service takes things one step further by bringing that cup to the library table or the dorm door, so nobody has to abandon a study session for a twenty-minute walk. You can begin with a single building or even one floor, then widen your range as orders pick up.
Don’t overcomplicate the menu. Black coffee, coffee with milk and one flavored option will cover most requests. Take orders through a Google Form or a group chat, and promise a delivery window you can truly hit. A hot cup that shows up late loses most of its charm.
Startup breakdown (about 60 cups):
Equipment: two thermal carafes $50, drip coffee maker $35, insulated delivery bag $15 = $100
Supplies: coffee beans (2 lb) $26, milk $9, sugar and syrups $14, 100 cups with lids and stirrers $22 = $71
Total outlay: $171
The math, in plain terms: beans cost about $0.43 per cup, milk $0.15, sugar and syrups $0.23 and the cup $0.22, so each cup runs about $1.03. At $3 a cup, you’ll keep $1.97. Sixty cups bring in $180, which nets only $9 on the first batch. After that, a batch of 60 costs about $62 in beans, milk, syrups and cups, so every repeat batch nets about $118.
12. Smoothie and Juice Stand
Not everyone wants caffeine. Smoothies draw gym-goers, breakfast skippers and anybody trying to eat a little healthier, and a build-your-own option, where customers pick two or three ingredients, gives the experience a personal feel. Set up near the rec center or a busy walkway, and you’ll catch people right when a post-workout drink sounds irresistible.
Buy fruit in bulk when it’s in season. Stick with two signature flavors, such as mango-banana and strawberry-yogurt, and add one rotating special. A free drink after five purchases will bring regulars back.
Startup breakdown (about 60 smoothies):
Equipment: blender $70, cooler $30, folding table $35, price sign $15 = $150
Supplies: fruits and vegetables $85, ice $15, 100 cups with lids and straws $24 = $124
Total outlay: $274
The math, in plain terms: fruit, ice and the cups you actually use cost about $1.91 per smoothie ($114.40 ÷ 60). At $5, you’ll keep $3.09. Sixty smoothies bring in $300 and net $26 on the first batch. Later batches cost about $114 and net about $186.
13. Specialty Tea Stall or Subscription Packs
Tea is cheaper than coffee and it gives students on a budget something to feel comfortable purchasing. Loose leaf tea means you have a lot of options to play around with. You could set up a small stall where you serve individual cups of tea or offer a subscription box service. Subscription boxes are easy because you can offer themed boxes such as 'study week survival’ or 'winter warmth’. You could also offer samples from your stall. If people find a particular flavour they like they will probably come back for more.
Do not include any health claims on the labels. This can cause issues legally if you promise things like ‘helps you sleep’.
Startup breakdown (subscription packs, about 20 packs):
Electric kettle for sampling: $25
Loose-leaf tea, four blends at 8 oz each, $14 per blend: $56
20 pouches $10, labels $5, sampling cups $10 = $25
Total outlay: $106
The math, in plain terms: tea, pouches and labels cost $71 for 20 packs, or $3.55 per pack. At $9 to $10, you’ll keep $5.45 to $6.45 per pack. Twenty packs bring in $180 to $200 and net $74 to $94.
Prefer serving cups? Tea costs about $0.25 per cup and the cup about $0.14, so each cup runs $0.39. At $2.50 a cup, you’ll keep $2.11.
Meal and Delivery Businesses for Busy Students
These are service-based food ideas for students. You will make more money per sale than selling snacks, but it will require more organization and there are stricter regulations too. Check your local food rules before you commit to either one.
14. Late-Night Food and Snack Delivery
By 11 p.m., the dining hall has locked its doors, nearby restaurants have stopped taking orders, and students are still hungry. A late-night delivery service steps into that gap with sandwiches, wraps, instant noodles and cookies. A short delivery window, such as 10 p.m. to 2 a.m., keeps the workload manageable and lets you get to bed at a decent hour.
Bundles help your numbers, like a sandwich with chips and a drink. Before you count on a hot plate, confirm what your building allows, since many residence halls ban open-element appliances. Delivery rules and personal safety matter here, too, and a later section covers both.
Startup breakdown (about 40 orders in the first week):
Equipment: sandwich press or toaster oven $30, electric hot plate $30, pan and pot $25, knife and cutting board $15, storage containers $12 = $112
Packaging: 50 foil boxes or paper bags $18
First-week ingredients (bread, cheese, sauces, noodles, vegetables, snacks): $100
Insulated delivery bag: $20
Total outlay: $250
The math, in plain terms: ingredients cost about $2.50 per order and packaging $0.45, so each order runs about $2.95. With an average order of $8 (a sandwich and a drink, say), you’ll keep about $5.05. Forty orders bring in $320 and net $70 in week one. After that, weekly supplies cost about $118, so a 40-order week nets about $202.
15. Meal Prep for Busy Students
Between classes, jobs and clubs, many students skip meals or live on instant noodles. A weekly meal prep service hands them portioned, reheatable dinners, and it hands you predictable repeat orders. Chicken with rice, pasta with vegetables and a vegetarian curry already cover a wide range of tastes.
Offer two or three meal choices and two portion sizes, and give a small discount to students who prepay for a full week or month. Be aware that prepared meals rank among the most heavily regulated foods in this guide, and many places require a licensed kitchen for them.
Startup breakdown (about 40 meals a week):
Equipment: large pot and pan $40, knives and cutting boards $22, digital scale $10, two cooler bags $24 = $96
Weekly supplies: ingredients at about $2.75 per meal $110, 40 three-compartment containers $24, labels $8 = $142
Total outlay: $238
The math, in plain terms: each meal costs about $3.55 ($142 ÷ 40). At $8 a meal, you’ll keep $4.45. Forty meals bring in $320, which nets $82 in week one and about $178 in every week after that.
Campus Market and Cart Ideas
Markets and carts put you in front of crowds, so they can grow a business quickly. They also cost more, and they require approval from event organizers or campus administration.
16. Campus Farmers’ Market Stall
Many universities host weekend or monthly markets where students, staff and neighbors come to shop. A stall lets you meet customers face to face, hand out samples and find out which product people really want. Granola bars, flavored popcorn, bread and dessert jars all suit a market table nicely.
Visit a market before you apply, and notice which stalls draw the longest lines. Bring only two or three signature items, and ask shoppers what they’d like to see next time. That feedback is worth more than the sales on day one.
Startup breakdown (lean version, one market day, about 60 items):
Stall or table fee: $40
Packaging for 60 items: $18
Ingredients for 60 items: $60
Banner, price signs and display extras: $35
Cooler bag: $15
Card reader: $25
Total outlay: $193 (a canopy at $60 and a folding table at $35 would add $95 if you can’t borrow them)
The math, in plain terms: ingredients and packaging cost $78 for 60 items, or $1.30 each. At $4 per item, you’ll keep $2.70. Sixty items bring in $240 and net $47 on day one. Every later market costs about $118 (the $40 fee plus $78 in supplies), so a sell-out nets about $122.
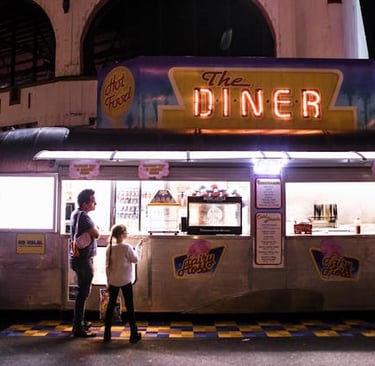
17. Mini Food Cart
A cart can roll to wherever students gather, whether that’s outside lecture halls, at sports events or around a club fair. It’s also the biggest investment on this list, so it makes the most sense after you’ve proven demand with something cheaper. Test your menu at a market stall first. Then pick the two items that sell fastest, add one combo deal and post your location every day on social media.
Startup breakdown:
Small cart or compact food truck, used or compact: $1,000 to $3,000
Cooking equipment (grill, hot plate or sandwich press): $100 to $300
Utensils and cookware: $50 to $100
First batch of ingredients: $100 to $150
Disposable packaging: $30 to $50
Branding and signage: $50 to $100
Total outlay: $1,330 to $3,700, before mobile vending permits, which vary by city and campus and aren’t included here
The math, in plain terms: suppose your average sale is $6 and ingredients plus packaging cost $2, so you keep $4 per sale. Earning back $1,330 would take about 333 sales, and earning back $3,700 would take about 925. That’s why a cart rewards planning and a steady schedule far more than guesswork.
How Much Money Do You Need to Start a Food Business?
Most of these ideas are in the ballpark of $57 and $300, but the only large item is the cart. A more interesting question is what do you get for your money? There are two very different things being spent on in a startup.
What You Pay Once vs What You Pay Every Batch
The equipment costs are one-time only. When you invest in the scale, blender or baking trays, you can use them many times over.
Ingredients, packaging and labelling, on the other hand, will need to be purchased each time. This means that for your first few batches you won't make much profit. From what we have seen throughout this guide, you will make far less profit in your first few batches than you will later on. For example, the coffee delivery batch makes you $9, yet every batch afterward nets about $118. Don't be discouraged by the low profit in your first week. Keep at it!
Other Costs Students Mustn't Forget
Apart from the shopping list, a handful of smaller expenses can sneak up on you:
Permit or registration: anywhere from nothing in some places to $150 or more in others
Food handler course: usually about $7 to $15 online, depending on your state
Payment fees: card readers and payment apps typically take a small cut of every sale
Market or stall fees: often $25 to $75 per market day
Waste: perishable ingredients that go unsold, which is exactly why pre-orders help so much
None of these will sink you on its own, but when put together on an Excel sheet, they can shave a noticeable slice off a thin margin. Build them into your prices from day one.
Where to Cut Costs
Borrow before you buy. A roommate or relative may already own a scale, a mixer or a folding table. Browse campus resale groups for used equipment, and split bulk orders with friends. Perfect one product before you add a second, and test demand with a small batch rather than ordering packaging for hundreds of units. Every dollar you hold back in the early weeks is a dollar you can put toward ingredients that actually sell.
Easiest Food Businesses for College Students to Start in a Dorm
“Easy” means a low startup cost, few rules, no oven and a product that lasts. By that definition, some rise straight to the top, and some others ask for more skill or more paperwork.
Easiest Options
Dry-mix cookie jars ($57), spice blends ($82), granola and trail mix ($94) and snack boxes ($106) are the friendliest places to begin. Everything is shelf-stable, nothing requires cooking in your room, and you can prepare it days ahead. If you’ve never run a business before, choose from this group. A modest first batch lets you practice pricing, packaging and talking to customers before the stakes rise.
Easy With a Little Practice
Popcorn ($83), tea packs ($106), gift boxes ($88) and bread ($115) take a bit more skill or equipment. Popcorn calls for consistent seasoning, tea depends on blends people actually enjoy, gift boxes reward good timing around birthdays and finals, and bread needs both patience and an oven. None of them is hard, but each one pays off if you practice before you start charging.
Harder Options
Anything refrigerated or hot lands here: refrigerated jars, coffee, smoothies, late-night food and meal prep. These ideas come with stricter rules, spoil faster and demand tight schedules. The food cart tops the difficulty list because of its price tag, its paperwork and its daily workload. Try one of the easier options first, then move up once you’ve found your rhythm.
Which Food Business Model Fits You Best?
Choosing between two good ideas can be harder than picking a first one. We have derived the following five matchups based on the numbers from earlier in this guide to help you decide.
Dorm-Friendly Baked Goods vs a Meal-Prep Service
True dorm-friendly baked goods usually means small-batch or dry-mix products, since a full oven is rare in a residence hall. Cupcakes and cookies cost about $150 to start and leave $6.50 per six-pack. Meal prep costs about $238 and leaves $4.45 per meal, although it can bring in around $178 each week once it hums along. Baked goods win on lower startup cost and simpler rules, whereas meal prep wins on repeat revenue. If you live in a dorm and your hours are limited, begin with baked or dry-mix goods. If you have a full kitchen and a licensed route, meal prep can out-earn them.
Snack Boxes vs Single-Item Treats
A snack box costs $106 to start and earns $3.30 to $5.30 per sale. A single item, such as a $3 bag of popcorn, costs $83 and earns $1.75 per sale. The box makes more per customer and suits gifts nicely, but it demands more sourcing and more careful allergen labeling. The single item sells faster at an impulse price and takes less effort to produce. A sensible path is to launch with one single item, learn what people love, and then bundle your best sellers into a box.
A Delivery Side Hustle vs Campus Markets
Late-night delivery costs about $250 and earns about $5.05 per order, and it fits neatly into your evenings. A market stall costs about $193 in the lean version and earns $2.70 per item, but it squeezes your sales into a few busy hours. Delivery builds a base of repeat customers, whereas markets build visibility and hand you instant feedback. Choose delivery if you’re a night owl with permission to deliver. Choose markets if you’d rather work a scheduled weekend shift.
Selling Packaged Goods Online vs Selling to Neighbors and Classmates
Online sales can stretch your reach, but shipping homemade food comes with strict rules in many places, and postage plus packaging will eat into thin margins. Selling directly to classmates and neighbors costs nothing in shipping, gives you same-day feedback and spreads by word of mouth. For most students, the winning move is to sell locally first, using an online form or storefront only for orders and payment.
Cottage Food Sales From Home vs a Commercial Kitchen for Scaling
Selling from home under cottage food rules keeps costs low, but those rules usually limit you to shelf-stable products, cap your yearly sales and restrict where you can sell. A commercial or shared kitchen removes many of those limits and allows perishable foods and full meals. It costs more, though, and shared kitchens often charge by the hour or by the month, so call two or three local options for current rates. A geneal rule of thumb: stay with home production until demand outgrows your space, or until you want to sell something the cottage rules exclude.
Food Safety Certification and Training
Even where nobody requires a certificate, food safety training protects your customers and your reputation. On a small campus, a single case of food poisoning can sink a business overnight, and word of it would spread faster than any menu you post. A little knowledge up front goes a long way.
Food Handler Courses and Where to Take Them
Many US states and counties require or recognize a food handler card, and online courses usually cost about $7 to $15 and take an hour or two. Pick a course approved by your state or county, because a certificate from an unapproved provider may not count. Outside the US, ask your local food authority which training it accepts. Even if nobody demands a certificate from you, finishing a course will give you the confidence to answer buyers’ questions, and mentioning it on your menu or social media page can build trust fast.
Safe Handling and Storage in a Small Space
Tight quarters make cross-contamination easy, so build good habits early:
Wash your hands for at least 20 seconds before and during food prep
Clean and sanitize counters, boards and tools before every batch
Store raw ingredients away from ready-to-eat food
Use a food thermometer instead of guessing
Hold cold food at or below 41°F (5°C) and hot food at or above 135°F (57°C)
Never leave perishable food out for more than two hours
Store your inventory in a dedicated, sealed bin away from roommates’ food
Skip food prep for sale whenever you’re feeling sick
Tape a short checklist to your fridge or wall, so you aren’t relying on memory during a hectic week.
Allergen Awareness
The major food allergens in the US are milk, eggs, fish, shellfish, tree nuts, peanuts, wheat, soybeans and sesame. Shared kitchens create cross-contact, so a cookie baked on a tray that previously held peanut butter bars can still trigger a reaction. List allergens on every label, answer allergy questions honestly (and say “I’m not sure” when you aren’t), and add a note if your kitchen handles common allergens. A buyer with a severe allergy will trust you more for admitting your limits than for guessing.
Best Small Kitchen Equipment for a Dorm or Apartment Food Startup
Buy the smallest tool that gets the job done, and buy it only after you've received a real order. The prices below are rough ranges that vary by store.
Must-Have Basics
Digital kitchen scale: $10 to $15
Digital food thermometer: $10 to $15
Airtight storage containers: $10 to $25 for a set
Measuring cups, spoons and silicone spatulas: $10 to $20
Cutting boards and a sharp knife: $15 to $25
Appliances That Would Fit a Dorm
Space and electrical limits shape what you can run in a residence hall:
Mini fridge: $100 to $200 (skip this if your room already has one)
Microwave: often provided already, so check first
Air popper: $20 to $35
Electric kettle: $20 to $30
Compact blender: $25 to $70
Compact toaster oven: $40 to $70, only where your building allows it
Hot plates, grills and other open-element appliances are banned in many residence halls, so ask before you plug anything in.
Pro Tip: Consider buying used or borrow.
Campus resale groups, thrift stores and online marketplaces sell small appliances at a fraction of the new price. Graduating students often unload kitchen gear in May, which makes late spring a great time to shop. Wash and test everything before it touches food, and borrow the rarely used items, like a hand mixer, from friends instead of buying them.
Packaging, Labeling and Shelf-Life Tips
Packaging protects the food, tells buyers what’s inside and makes your product look worth its price. Labeling rules vary by place, so confirm the details with your local food authority.
Packaging by Product Type
Dry goods like granola and spice blends do well in resealable pouches or small jars. Baked goods need boxes with liners, so frosting doesn’t smear. Jars call for tight lids and a safety seal or tag. Drinks need lids and sleeves. Transparent jars and window boxes let buyers see exactly what they’re getting, and a simple sticker with your brand name makes the product memorable. Presentation also earns you pricing power: the same cookie in a neat labeled box can sell for more than one in a sandwich bag.
What to Put on the Label
A typical label includes the following, although your area may ask for more or less:
Product name
Ingredients, listed in descending order by weight
Allergens
Net weight or volume
Your name and contact details, or a registration number where allowed
A “made on” or “best by” date
A statement that the food was made in a home kitchen, if your area requires one
Print a test label before you order a hundred stickers. Check that the type is large enough to read and that nothing gets cut off at the edge.
Shelf Life and Storage Without a Big Fridge
Shelf life depends on the recipe and the packaging. As a rough guide, soft baked goods stay good for several days in airtight packaging, bread for a few days, and dry items like granola, spice blends and dry-mix jars for several weeks. Test a sample batch before you promise anyone a date, and always write a conservative “best by” date. Refrigerated products need cold storage the whole time they’re in your hands, which a small dorm fridge can only support in modest volumes.
How to Price Homemade Food and Make a Profit
Underpricing ranks among the most common mistakes new sellers make. A fair price covers your supplies, pays you for your time and leaves a cushion for fees, waste and growth.
The Cost-Plus Formula
Below's a straightforward method you can reuse for every product:
Step 1: Add up your supplies per unit (ingredients, packaging and labels).
Step 2: Add your labor per unit, which means the minutes it takes divided by 60 and multiplied by an hourly rate you set for yourself.
Step 3: Multiply the total by 1.3 to 1.5, so the price also covers fees, waste and future equipment.
The multiplier feels arbitrary at first, but it’s your safety net. Payment apps take a cut, ingredients go up in price, and some batches simply flop.
Worked Examples
Take a snack box. Supplies cost $4.70. If assembly takes 8 minutes and you pay yourself $12 an hour, labor comes to $1.60. The total is $6.30, and a 1.4 multiplier gives $8.82, so a price of $9 makes sense.
Now try a six-pack of cupcakes. Supplies cost $7.50. If your share of baking and decorating takes 19 minutes at $12 an hour, labor comes to $3.80, and the total is $11.30. A 1.4 multiplier gives $15.82, so $16 works better than $14. At $14, you’d keep only $2.70 after paying yourself for your time.
Pro Tip: Always check your price against what students are already willingly paying for the same product.
Glance at what a nearby cafe, a vending machine or the dining hall charges for something similar. Students watch their budgets closely, so a price slightly below a cafe but comfortably above your cost tends to land well. Give small bundle discounts instead of cutting every price, and nudge prices upward once you have a waiting list.
Where to Find Vendors and Affordable Ingredients
Ingredients tend to be your biggest repeat cost, so shaving a few cents off each unit adds up quickly. A little detective work now will pay off with every batch.
Bulk Stores and Wholesale Clubs
Warehouse clubs, restaurant supply stores and bulk bins usually offer lower unit prices on flour, sugar, oats, nuts and packaging. Compare the price per ounce rather than the sticker price, since a big bag isn’t always the better deal. Buy only what you can use before the expiration date. Forty pounds of discounted flour won’t help if half of it goes stale in your closet.
Local Suppliers and Student Discounts
Farmers markets usually mark down produce near closing time, and local bakeries or roasters may sell ingredients at wholesale prices if you ask them politely. Plenty of stores and online suppliers also offer student discounts, so mention your status at checkout. Once you find a supplier you like, become a familiar face. Regular customers sometimes get early word on sales and surplus.
Splitting Orders With Other Students
You can even team up with your friends and fellow student sellers on bulk purchases of packaging, jars or dry ingredients. That way, everyone will get a better unit price without ending up with a mountain of supplies. But of course, hold on to receipts for everything, because they'll help you track your costs and prove what you spent.
How to Sell Your Food on Campus
Approach the people closest to you, and expand only after you’ve seen proof that they’ll pay and come back for more.
Selling to Classmates and Dorm Neighbors
Your first ten customers will probably be people you already know. Offer a small taste, take pre-orders and ask for honest feedback. Then ask each happy customer to introduce you to one friend. This slow, personal approach feels almost too modest, yet it’s how many campus businesses build a reputation that lasts.
Instagram, WhatsApp and Campus Group Chats
Post sharp photos of your product, a short menu and your prices. Share them in campus group chats and on social media, and follow each group’s rules about promotions. Pre-order messages (“Orders close Thursday at 8 p.m.”) help you control volume and cut waste. Reply quickly, too. A buyer who waits three hours for an answer often moves on.
Campus Events and Club Orders
Clubs, sports teams and cultural societies host events all year, and they frequently need food. Pitch a bulk order with a discount, and hand the organizer a small sample. Approval to sell at an event usually runs through student affairs or the club itself, so ask early.
Best Online Platforms for Selling Homemade Food as a Student
For most student businesses, the best platform is the most straightforward one that collects payment before you cook. Judge any option on four things: how it takes orders, how it handles payment, what it charges and whether it supports local pickup.
Social Media DMs and Messaging Apps
Direct messages cost nothing and suit your first few customers. The downside is that orders get lost in the scroll, and you have no catalog or checkout. Use messages to get started, but plan to graduate to something more organized once regular orders roll in.
Google Forms and Payment Apps
A free order form paired with a payment app gives you a menu, an order list and a way to collect money up front. You’ll still need to match payments to orders by hand, yet this setup works well for pre-orders and a weekly menu.
Online Stores and Marketplaces
Online stores and marketplaces give you a catalog, a checkout and customer records. They usually charge subscription or transaction fees that change over time, so compare current pricing before you commit. Shipping homemade food is restricted in many places, so treat these tools as a way to take local pickup orders unless you’ve confirmed that shipping is legal for your product.
How to Deliver Food or Handle Pickup Safely in a Dorm
It's not uncommon for safety, privacy and housing rules collide during handoff and cause trouble. A solid system will protect you as well as your customers.
Pickup Points and Safe Meetup Spots
Choose a public, well-lit pickup spot, such as a building lobby, a library entrance or a campus cafe area, and set pickup windows. Take payment in advance so the handoff takes seconds. Avoid sharing your room number with customers, and tell a friend whenever you’re making late-night handoffs.
Delivering Inside a Dorm and Campus Security Rules
Many residence halls restrict who may enter and whether residents may deliver to other people’s rooms. Ask your housing office what’s allowed, especially for late-night service. If inside delivery is off the table, switch to lobby handoffs and send a text when you arrive.
Keeping Hot and Cold Food at Safe Temperatures
Use insulated bags for hot food and cooler bags with ice packs for cold food. Hold cold items at or below 41°F (5°C) and hot items at or above 135°F (57°C), and don’t let perishable food sit out for more than two hours. When in doubt, throw it out. Losing one batch costs far less than losing a customer’s trust.
How to Start in 30 Days
A week-by-week schedule will keepsyour studies on track. The plan below assumes you can spare about five hours a week.
Days 1 to 3: Pick one product from this guide and read your housing contract. Get written permission from your housing office or landlord.
Days 4 to 7: Look up your local food rules, and note any registration, course, label requirements and sales caps.
Days 8 to 12: Register or take your food handler course, if required. Test your recipe and record the cost of every ingredient.
Days 13 to 17: Set your price using the cost-plus formula, then order packaging and labels.
Days 18 to 22: Make a trial batch, photograph the product and gather feedback from five friends.
Days 23 to 27: Set up an order form and a pickup spot, then announce your menu in two group chats.
Days 28 to 30: Take your first pre-orders, deliver them and jot down what sold and what didn’t.
FAQs
What are the easiest food businesses for college students to start in a dorm?
The easiest are dry-mix cookie jars ($57), spice blends ($82), granola and trail mix ($94) and snack boxes ($106). They are shelf-stable and need no oven, and you can make them ahead. Confirm with your housing office first.
How much money do I need to launch a home-based food business?
Most student ideas in this guide start between about $57 and $300, with the food cart at $1,330 to $3,700. Remember that equipment is a one-time cost, so later batches cost much less than the first.
What permits and licenses do I need to sell food from my home or dorm?
It depends on your location and product. Start with permission from your housing office or landlord. Then check your area’s cottage food or home food rules, a food handler certificate, label requirements and any business license. Perishable foods and meals usually need a licensed kitchen.
How can I safely deliver food or manage pickup while living in a dorm?
Use a public pickup spot, take payment in advance and keep your room number private. Use insulated or cooler bags, keep cold food at or below 41°F (5°C) and hot food at or above 135°F (57°C) and follow your building’s rules on guests and deliveries.
Which online platforms are best for selling homemade food as a student?
Start with messaging apps and a free order form on a basic payment app. Move to an online store when you have regular orders. Compare current fees and use local pickup unless shipping your product is legal.
What are a few common mistakes you've seen student food sellers make?
Nearly every new seller stumbles somewhere. Knowing the usual trip wires can save you money, time and a few awkward conversations.
Skipping permission from housing or campus offices. One complaint from a neighbor can shut you down.
Underpricing and forgetting to count your own time. Busy doesn’t always mean profitable.
Offering too many menu items at once. A long menu means more waste and slower service.
Ignoring allergen labels. It’s a safety issue first and a trust issue second.
Buying expensive equipment before testing demand. Rent, borrow or buy used until sales prove the need.
Mixing personal and business money. A separate envelope or account makes tracking much easier.
Promising delivery times that exams make impossible. Build in slack during midterms and finals.
Letting grades slide to keep up with orders. The business exists to support your education, not the other way around.
To Wrap Up
A student food business works best when it starts small. Pick one idea that matches your kitchen and your budget, secure permission to run it, confirm the local food rules and make a trial batch. Then sell to ten classmates this week, track what you spend and earn, and let those numbers tell you whether to grow or fold.
For best results, observe what your peers enjoy, where they spend most of their time, and what makes a product attract attention Simple touches such as eco-friendly packaging, fun flavors, dietary preference-friendly menu, or transparent pricing can generate quick sales. Most importantly, listen to your customers feedback. That will help improve your offerings and keep them coming back.
Good luck!
Author Bio
Ronan is a business and entrepreneurship writer with a passion for helping beginners. His articles provide practical steps, encourage calm decision-making, and guide readers in building solid foundations. He loves breaking big ideas into simple lessons that feel achievable.

Explore
Welcome to Stay Curious, your home for free online calculators and blogs that make you stop and think. Here, questions never get old and answers are always a little unexpected.
We dig into the weird and wonderful, challenge the obvious, and cover topics that make you think, "Why didn't I know this sooner?" From quirky facts to deep dives into everyday mysteries, we are all about satisfying that itch for knowledge you didn't know you had.
So go ahead, stay curious. We promise it'll be worth your while. Or, you know, not. ;)
Contribute
Learn
ask.staycurious@gmail.com
© 2025. All rights reserved.
We welcome guest posts on business, tech, travel, finance, lifestyle, career, relocation, and home improvement. Submissions must be original, unpublished (online), at least 800 words, and written in English.
Ready to contribute? Contact us with your ideas!